As a homeowner, I’ve always believed that outdoor living spaces are an extension of our homes, offering a unique blend of nature and comfort. These areas have evolved from simple patios to elaborate outdoor rooms, complete with kitchens, lounging areas, and even entertainment centers. The concept of outdoor living has gained significant traction in recent years, with more people recognizing the value of creating functional and aesthetically pleasing spaces outside their homes.
Outdoor spaces serve multiple purposes – they provide a retreat from the confines of indoor living, offer opportunities for entertaining guests, and can significantly increase property value. Whether you have a sprawling backyard or a compact urban balcony, there’s always potential to transform your outdoor area into a personal oasis.
The key to a successful outdoor living space lies in thoughtful planning, innovative design, and attention to detail. From the initial construction phase to the final touches of lighting, every element plays a crucial role in creating a cohesive and inviting environment. In this comprehensive guide, I’ll walk you through the process of transforming your outdoor space, sharing expert tips and insights along the way.
Planning Your Outdoor Area
Before diving into construction or design, it’s essential to have a clear vision for your outdoor space. This planning phase is critical and can make the difference between a mediocre patio and a stunning outdoor living area. Here’s how I approach the planning process:
- Assess your needs: What do you want to use the space for? Will it be primarily for relaxation, entertaining, or outdoor dining? Understanding your needs will guide your design decisions.
- Consider the climate: Your local weather patterns should influence your choices. For instance, if you live in a rainy area, you might want to incorporate covered spaces or waterproof furnishings.
- Evaluate your budget: Be realistic about what you can afford. Remember to factor in not just initial construction costs, but also ongoing maintenance expenses.
- Check local regulations: Before making any significant changes, ensure you’re complying with local zoning laws and building codes.
- Think about flow: How will your outdoor space connect with your indoor living areas? Aim for a seamless transition between the two.
When planning my own outdoor space, I found it helpful to create a mood board with inspiration images and a rough sketch of the layout. This visual aid helped me communicate my ideas to contractors and ensured everyone was on the same page.
Remember, a well-planned outdoor space should feel like a natural extension of your home. It should reflect your personal style while also being practical and functional.
Essential Construction Tips for Patios
The patio often serves as the foundation of an outdoor living space. Whether you’re building a new patio or renovating an existing one, here are some essential construction tips I’ve learned:
- Choose the right location: The patio should be easily accessible from your home and positioned to take advantage of sunlight and shade throughout the day.
- Ensure proper drainage: A slight slope (about 1/4 inch per foot) away from your house will prevent water from pooling on the patio or seeping into your home’s foundation.
- Use a sturdy base: A solid sub-base of compacted gravel is crucial for preventing settling and cracking over time.
- Consider expansion joints: These allow for the natural expansion and contraction of materials due to temperature changes, preventing cracks.
- Plan for utilities: If you’re including features like an outdoor kitchen or lighting, plan for necessary electrical and plumbing installations before laying the patio.
When I constructed my patio, I learned the importance of proper excavation. Removing all organic material and creating a level base made a significant difference in the longevity and stability of the patio.
Remember, while DIY patio construction is possible, complex designs or large areas often benefit from professional expertise. Don’t hesitate to consult with a landscape architect or contractor for challenging aspects of the project.
Choosing the Right Materials for Your Outdoor Space
The materials you choose for your outdoor space play a crucial role in both aesthetics and functionality. Here’s a comparison of popular patio materials:
| Material | Pros | Cons |
|---|---|---|
| Concrete | Durable, versatile, cost-effective | Can crack, plain appearance |
| Pavers | Wide variety of styles, easy to repair | Higher initial cost, may settle over time |
| Natural stone | Beautiful, unique appearance | Expensive, can be slippery when wet |
| Wood | Warm, natural look | Requires regular maintenance, can rot |
| Composite decking | Low maintenance, durable | Can look artificial, higher cost |
When selecting materials, consider factors like:
- Durability: How well will the material withstand your local climate?
- Maintenance: How much time and effort are you willing to invest in upkeep?
- Aesthetics: Does the material complement your home’s architecture?
- Safety: Is the surface slip-resistant, especially important for pool areas?
- Cost: Both initial installation and long-term maintenance costs should be considered.
In my experience, combining materials can create a more interesting and functional space. For instance, I used concrete for the main patio area for its durability and cost-effectiveness, but incorporated natural stone accents for visual interest.
Don’t forget about vertical surfaces too. Retaining walls, privacy screens, and pergolas can be constructed from materials that complement your patio, creating a cohesive look throughout your outdoor space.
Incorporating Natural Elements in Design
Integrating natural elements into your outdoor living space can create a harmonious blend between your constructed area and the surrounding environment. Here are some ways I’ve successfully incorporated nature into outdoor designs:
- Plant selection: Choose a mix of native plants, ornamental grasses, and flowering perennials to add color, texture, and biodiversity to your space.
- Water features: A fountain, pond, or even a small stream can add a soothing auditory element and attract wildlife.
- Natural stone: Incorporate boulders or flagstones as accent pieces or seating areas.
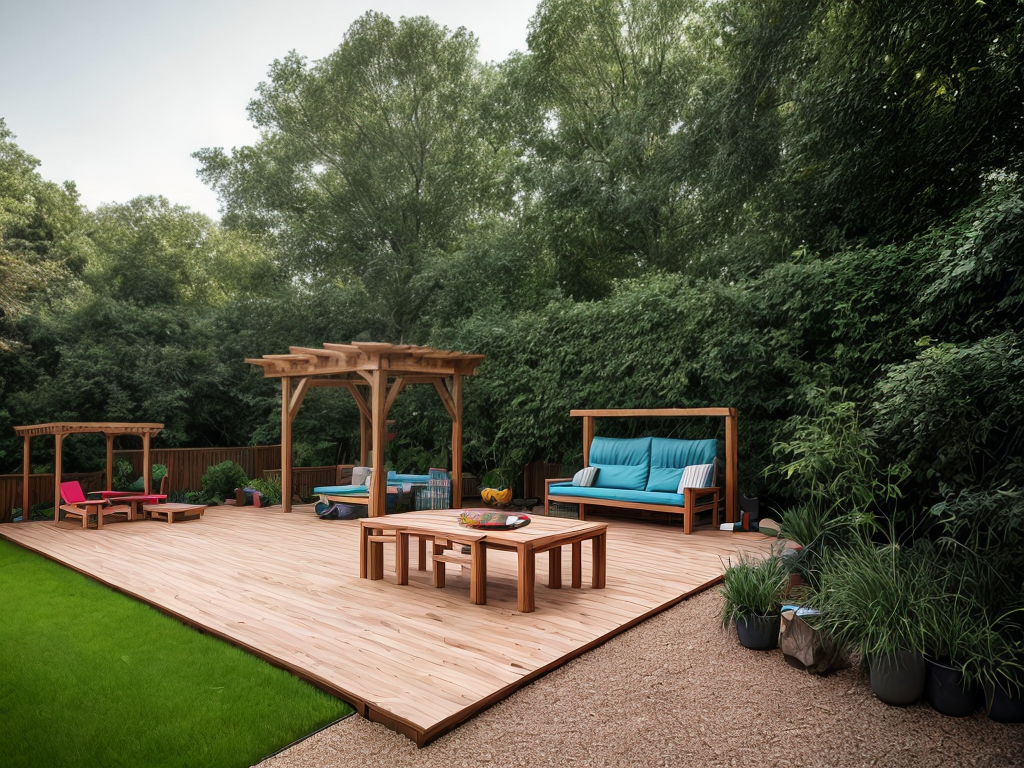
- Wood elements: Use cedar or redwood for pergolas, benches, or decorative screens to add warmth and organic texture.
- Living walls: Vertical gardens can maximize green space in smaller areas and provide a stunning visual focal point.
When designing my outdoor space, I created a rock garden with drought-resistant plants, which not only added visual interest but also required minimal maintenance. I also installed a small water feature that became a favorite gathering spot for birds, adding life and movement to the area.
Remember, the goal is to create a space that feels like a natural extension of the surrounding landscape. This approach not only enhances the aesthetic appeal but can also contribute to the local ecosystem by providing habitats for birds, butterflies, and beneficial insects.
Enhancing Your Garden Layout
A well-designed garden can elevate your outdoor living space from good to extraordinary. Here are some tips I’ve gathered for creating an engaging and functional garden layout:
- Create zones: Divide your garden into distinct areas for different purposes, such as a vegetable patch, flower beds, and a seating area.
- Use paths: Incorporate winding pathways to guide visitors through the garden and create a sense of discovery.
- Add focal points: Use sculptures, water features, or statement plants as eye-catching elements that draw attention and create visual interest.
- Consider height: Mix plants of varying heights to create depth and dimension. Trellises or arbors can add vertical interest.
- Plan for all seasons: Choose plants that provide interest throughout the year, from spring blossoms to fall foliage and winter structure.
In my garden, I implemented a cottage garden style with a mix of perennials and annuals for continuous blooms. I also incorporated raised beds for vegetables, which not only made gardening easier but also added structural elements to the design.
Don’t forget to consider maintenance when planning your garden layout. Group plants with similar water and sunlight needs together for easier care. Also, leave enough space between plants to allow for growth and easy access for pruning and weeding.
Remember, a garden is a living, evolving space. Be prepared to adjust your design as plants grow and your needs change over time.
The Role of Lighting in Outdoor Design
Outdoor lighting is more than just a practical necessity; it’s a powerful design tool that can transform your outdoor space. Well-planned lighting can:
- Extend usability: Illuminate your outdoor areas to enjoy them well into the evening hours.
- Enhance safety: Light pathways and steps to prevent accidents.
- Create ambiance: Use soft lighting to set a mood for relaxation or entertaining.
- Highlight features: Accentuate architectural elements, plants, or water features.
- Increase security: Deter intruders with strategic lighting.
When designing my outdoor lighting scheme, I focused on layering light from different sources. I used a combination of task lighting for cooking and dining areas, accent lighting to highlight landscaping features, and ambient lighting for overall illumination.
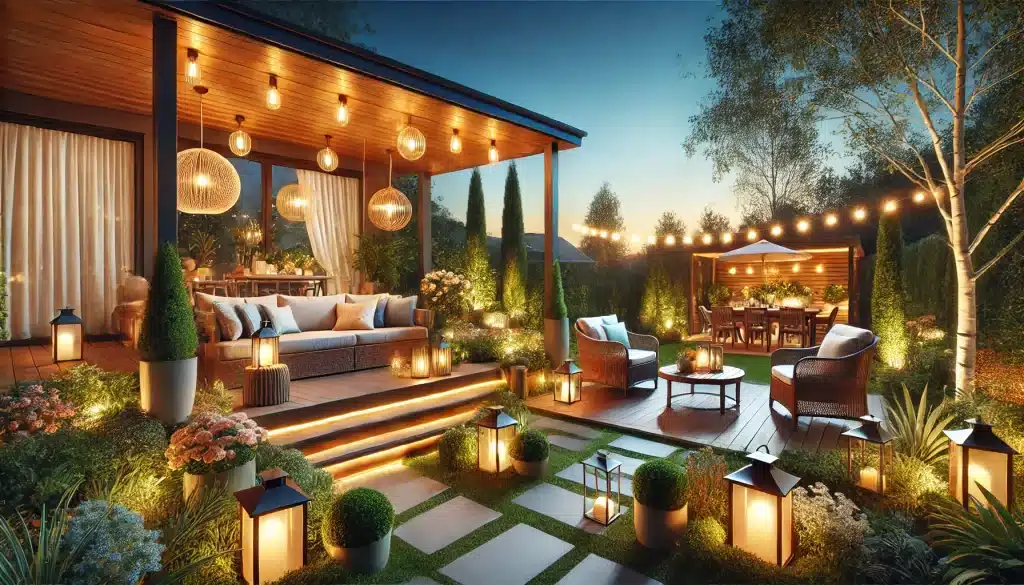
It’s important to consider the color temperature of your lighting. Warm white light (2700-3000K) creates a cozy, inviting atmosphere, while cooler light (3000-4000K) can be used to mimic moonlight or highlight water features.
Remember, less is often more when it comes to outdoor lighting. Overlighting can create harsh glare and disrupt the natural nighttime environment. Aim for a subtle, balanced lighting scheme that enhances rather than overwhelms your outdoor space.
Types of Outdoor Lighting
There are numerous types of outdoor lighting fixtures available, each serving different purposes. Here’s an overview of some popular options:
- Path lights: These low-level lights illuminate walkways and garden paths for safety and guidance.
- Spotlights: Used to highlight specific features like trees, sculptures, or architectural elements.
- Floodlights: Provide broad illumination for large areas, often used for security purposes.
- String lights: Create a festive ambiance, perfect for entertaining areas.
- Step lights: Installed on stairs or deck steps for safety and subtle illumination.
- Wall sconces: Mounted on exterior walls to provide both functional and decorative lighting.
- Underwater lights: Used in ponds or fountains to create dramatic effects.
- Lanterns: Freestanding or hanging fixtures that add a decorative touch.
In my outdoor space, I particularly love the string lights I installed over the dining area. They create a magical, starry effect that’s perfect for evening gatherings. I also used LED strip lights under the edges of my raised beds, which provides a modern, subtle glow at night.
When choosing lighting fixtures, consider their durability and weather resistance. Look for fixtures rated for outdoor use and appropriate for your climate. Also, think about the style of the fixtures – they should complement your overall outdoor design aesthetic.
Benefits of Solar Lighting
Solar lighting has become increasingly popular for outdoor spaces, and for good reason. Here are some key benefits I’ve discovered:
- Energy efficiency: Solar lights use free energy from the sun, reducing electricity costs.
- Eco-friendly: They don’t contribute to carbon emissions, making them a sustainable choice.
- Easy installation: Most solar lights don’t require wiring, making them simple to install and reposition.
- Low maintenance: With no electrical components to worry about, solar lights are generally easy to maintain.
- Safety: No risk of electrical shock, making them safe around water features or in areas children play.
- Versatility: Available in various styles, from path lights to decorative lanterns.
I’ve incorporated solar lights in several areas of my garden, particularly along pathways and in remote corners where running electrical wiring would have been challenging. The latest LED solar lights I’ve used provide bright, reliable illumination and can last for several hours after sunset.
One tip I’ve learned is to ensure the solar panels receive adequate sunlight during the day. If you live in an area with limited sunlight, you might need to opt for higher-quality solar lights with more efficient panels and larger batteries.
While solar lights are fantastic for many applications, they may not be suitable for all lighting needs, especially where very bright or consistent lighting is required. In these cases, a combination of solar and traditional electrical lighting can offer the best of both worlds.
Security Lighting Options
Security lighting is an essential aspect of outdoor design that shouldn’t be overlooked. It not only deters potential intruders but also enhances safety for you and your guests. Here are some effective security lighting options I’ve explored:
- Motion-activated floodlights: These powerful lights turn on when they detect movement, illuminating large areas instantly.
- Dusk-to-dawn lights: Automatically turn on at sunset and off at sunrise, providing consistent illumination throughout the night.
- Smart lighting systems: Can be controlled remotely via smartphone apps, allowing you to turn lights on and off even when you’re away from home.
- Timers: Allow you to set specific times for lights to turn on and off, creating the illusion of occupancy.
- Landscape lighting: While primarily decorative, well-placed landscape lighting eliminates dark spots where intruders might hide.
In my own setup, I’ve found a combination of motion-activated lights and smart lighting to be particularly effective. The motion-activated lights cover the perimeter of my property, while the smart lighting system allows me to control the lights in my main outdoor living area from my phone.
When installing security lighting, it’s important to consider your neighbors. Ensure that your lights are positioned to illuminate your property without shining directly into neighboring homes or gardens. Also, check local regulations regarding outdoor lighting to ensure compliance.
Remember, the goal of security lighting is to create a well-lit environment that discourages unauthorized access while still maintaining an inviting atmosphere for you and your guests.
Decorative Lighting Ideas
Decorative lighting is where you can really let your creativity shine in your outdoor space. It’s not just about illumination; it’s about creating atmosphere and enhancing the overall aesthetic of your outdoor living area. Here are some decorative lighting ideas I’ve successfully implemented:
- Fairy lights: Delicate string lights draped through trees or along fences create a magical, whimsical atmosphere.
- Lanterns: Whether hanging or placed on tables, lanterns add a cozy, intimate feel to any space.
- Uplighting: Placing lights at the base of trees or architectural features creates dramatic shadows and highlights textures.
- Fire features: While not traditional lighting, fire pits or outdoor fireplaces provide both light and a focal point for gathering.
- Pendant lights: Suspended over outdoor dining areas, these can create the feel of an outdoor room.
- Illuminated planters: Combine greenery and light with planters that glow from within.
- Moonlighting: Placing lights high in trees to cast a soft, dappled light that mimics moonlight.
- Underwater lighting: In water features or pools, these create stunning visual effects.
In my outdoor space, I’ve fallen in love with the bistro lights I strung across my patio. They create a warm, inviting glow that’s perfect for evening entertaining. I’ve also used color-changing LED lights in my water feature, which allows me to change the mood of the entire space with the touch of a button.
When planning your decorative lighting, consider how it will look both when illuminated and during the day. Choose fixtures that complement your overall design even when they’re not lit.
Don’t be afraid to mix and match different types of decorative lighting. The key is to create layers of light that can be adjusted to suit different moods and occasions.
Installation Tips for Outdoor Lighting
Installing outdoor lighting can be a rewarding DIY project, but it’s important to approach it with care and knowledge. Here are some tips I’ve learned through my own experiences:
- Plan your layout: Before you start, create a detailed plan of where each light will go. Consider power sources, cable routes, and how the lights will interact with your landscape.
- Choose the right voltage: Most landscape lighting systems are low voltage (12V), which is safer and easier to install than line voltage (120V) systems.
- Use waterproof connections: Ensure all connections are properly sealed to prevent water ingress, which can cause short circuits.
- Bury cables properly: Cables should be buried at least 6 inches deep and run through conduit for extra protection.
- Install a timer or photocell: This allows your lights to turn on and off automatically, saving energy and effort.
- Use LED bulbs: They last longer, use less energy, and generate less heat than traditional bulbs.
- Balance your system: Ensure you’re not overloading your transformer by calculating the total wattage of all your lights.
- Consider professional help: For complex systems or if you’re not comfortable working with electricity, it’s worth hiring a professional.
When I installed my outdoor lighting system, I found it helpful to do a night test. I set up temporary lights and viewed them from different angles and distances to ensure the effect was what I wanted before finalizing the installation.
Remember, safety should always be your top priority when working with electrical systems. If you’re unsure about any aspect of the installation, don’t hesitate to consult with a licensed electrician.
Maintaining Your Outdoor Space
Creating a beautiful outdoor living space is just the beginning – maintaining it is key to ensuring it remains a cherished part of your home for years to come. Here’s how I approach maintaining my outdoor space:
Regular Cleaning and Upkeep
- Sweep and wash: I regularly sweep my patio and deck areas to prevent dirt buildup. A pressure washer can be great for deep cleaning concrete or stone surfaces once or twice a year.
- Furniture care: I clean my outdoor furniture according to the material – wiping down metal pieces, treating wood with appropriate sealants, and washing fabric cushions as needed.
- Grill maintenance: After each use, I clean my grill grates and do a deep clean of the entire unit at least once a season.
- Pruning and trimming: Regular pruning keeps plants healthy and maintains the desired shape of my garden. I trim hedges and trees as needed to prevent overgrowth.
Seasonal Tasks
- Spring: This is when I do a thorough cleaning of all surfaces, inspect for winter damage, and prepare garden beds for new plantings.
- Summer: I focus on watering, especially during dry spells, and deadheading flowers to encourage continuous blooming.
- Fall: I clean up fallen leaves, cut back perennials, and protect sensitive plants for the coming winter.
- Winter: In milder climates, I continue basic maintenance. In colder areas, I ensure all furniture and delicate items are properly stored or covered.
Lighting Maintenance
- Clean fixtures: I regularly wipe down light fixtures to remove dirt and debris that can dim their output.
- Check connections: I inspect wiring and connections for any signs of wear or damage, especially after severe weather.
- Replace bulbs: I keep track of bulb life and replace them proactively to ensure consistent lighting.
- Adjust timers: I adjust lighting timers seasonally to account for changing daylight hours.
Hardscape Care
- Seal surfaces: Every few years, I apply sealant to my patio and walkways to protect against stains and weather damage.
- Check for cracks: I regularly inspect concrete and stone surfaces for cracks and repair them promptly to prevent further damage.
- Re-sand joints: For paver patios, I occasionally re-sand the joints to keep the pavers stable and prevent weed growth.
Garden Maintenance
- Soil care: I test my soil annually and amend it as needed to ensure optimal plant health.
- Fertilizing: I follow a regular fertilizing schedule tailored to different plants’ needs.
- Pest control: I monitor for pests and diseases, using organic control methods whenever possible.
- Irrigation system: I check my sprinklers or drip irrigation system regularly, adjusting as needed for optimal watering.
Long-term Considerations
- Update and refresh: Every few years, I reassess my outdoor space. Sometimes, a fresh coat of paint on furniture or a new arrangement can breathe new life into the area.
- Energy efficiency: I periodically review my lighting setup, looking for opportunities to incorporate more energy-efficient options like LED bulbs or solar-powered fixtures.
- Sustainability: I’m always looking for ways to make my outdoor space more eco-friendly, such as incorporating rain barrels for water conservation or creating a compost bin for garden waste.
Maintaining an outdoor living space does require consistent effort, but I’ve found that regular, small tasks prevent the need for major overhauls. Plus, the time I spend tending to my outdoor space allows me to enjoy it fully and notice small changes and improvements over time.
Remember, your outdoor space is a living, changing environment. Embrace the evolving nature of your garden and be open to making adjustments as your needs and preferences change over time.
By following these maintenance tips, you can ensure that your outdoor living space remains a beautiful, functional, and enjoyable extension of your home for years to come. Whether you’re relaxing with family, entertaining friends, or simply enjoying a quiet moment in nature, a well-maintained outdoor space provides the perfect backdrop for creating lasting memories.
Conclusion
Transforming your outdoor living space doesn’t have to be overwhelming. By following these expert tips, you can create a beautiful and functional area that enhances your home’s appeal and your quality of life. Remember, the right lighting can make a significant difference in how you enjoy your outdoor space.


